
A great safari photo is rarely just about luck. It usually comes from a mix of timing, preparation, and a camera setup that can react fast when the scene changes in a second.
On safari, that scene can shift from a lion yawning in soft dawn light to a fish eagle lifting off the water in full sun, then to elephants crossing a dusty road at dusk. The best results come from keeping your setup simple, knowing your lens options, and choosing parks that match the kind of images you want most.
Start with settings that favor speed
Wildlife does not wait while you scroll through menus. That is why many photographers keep their approach straightforward: protect shutter speed first, then fine-tune aperture and ISO around the subject and the light.
A strong starting point is Manual mode with Auto ISO. You choose the shutter speed and aperture for the look you want, and the camera adjusts ISO as the light changes. This is especially useful on safari because game drives often move between open plains, shade, riverbanks, and backlit scenes very quickly. If that feels too hands-on, Aperture Priority is a very good second choice, especially for mammals and slower-moving subjects.
When in doubt, remember one rule: a slightly noisy image is usually better than a blurred one.
Here is a practical starting guide you can save to your phone before your trip:
| Situation | Suggested Mode | Shutter Speed | Aperture | ISO Range | Notes |
|---|---|---|---|---|---|
| Dawn, mammals walking | Manual + Auto ISO | 1/500 to 1/1000 | f/4 to f/5.6 | 400 to 1600 | Good balance for low light and moderate movement |
| Birds in flight | Manual or Shutter Priority | 1/2000 or faster | f/4 to f/6.3 | 800 to 3200 | Prioritize sharp wings and fast AF |
| Midday, large mammals | Aperture Priority | 1/500 to 1/2000 | f/5.6 to f/8 | 100 to 400 | Clean files and more depth of field |
| Resting animals at dusk | Manual + Auto ISO | 1/125 to 1/250 | widest available | 1600 to 6400+ | Raise ISO before letting motion blur ruin the shot |
| Landscapes with wildlife | Aperture Priority | 1/250 or faster | f/8 to f/11 | 100 to 400 | Keep habitat and subject sharp |
White balance matters less if you shoot RAW, which is highly recommended. Auto White Balance works well for most safari situations, and RAW gives you room to warm up sunrise scenes or correct cool shade later. If you prefer a richer golden-hour feel straight out of camera, a Cloudy setting can work nicely in early morning and late afternoon light.
Autofocus settings deserve just as much attention as exposure. Continuous autofocus, animal or eye detection if your camera supports it, and burst mode are all worth using. For birds and fast action, a wider focus area often works better than a tiny single point, especially from a moving vehicle.
Lens choices that make life easier
If most of your safari images will be wildlife portraits, a telephoto zoom is the most useful lens in the bag. A 100-400mm is one of the most flexible options for safari because it handles everything from elephant portraits to more distant predators. A 70-200mm is excellent when animals come very close to the vehicle or when you want looser environmental portraits. If birds are a big priority, many photographers prefer 150-600mm or a long prime.
A wide-angle lens still matters, even though safari is often linked with long glass. Some of the most memorable images are not tight headshots but animals placed in a bigger scene: elephants below Kilimanjaro, giraffes in storm light, or a lone lion framed by open plains. A 24-70mm or 16-35mm is ideal for that kind of storytelling image.
Try not to pack lenses based only on what seems impressive on paper. Pack for what you can actually carry, switch quickly, and use with confidence from a vehicle seat.
Image stabilization helps with camera shake, especially at longer focal lengths, but it does not freeze a moving subject. Weather sealing is also worth paying for if your budget allows it. Dust is part of safari life, especially on dry season drives.
After you have chosen your main lenses, a few simple extras will make the trip much easier:
- Extra batteries
- More memory cards than you think you need
- Lens cloths
- Rocket blower
- Bean bag for vehicle support
- Rain cover or dry bag
- Sensor cleaning kit
If you own two camera bodies, safari is one of the best times to use both. Keeping a telephoto on one body and a shorter zoom on the other reduces lens changes in dusty conditions and helps you react much faster when the scene changes.
The parks shape the pictures
Not every safari destination gives you the same kind of photographic opportunity. Some parks are built for action, some for landscapes, some for birdlife, and some for clean, reliable sightings that help newer wildlife photographers come home with a strong set of images.
The right choice depends on what you want to photograph most.
For families balancing different goals on the same trip, Mpala’s explanation of why South Africa works well across three generations underlines how good road networks, short transfers and consistent sightings can ease the learning curve for newer photographers.
| Park | Best For | Strong Season |
|---|---|---|
| Maasai Mara, Kenya | Migration drama, predators, open savanna scenes | July to October |
| Serengeti, Tanzania | Migration, big skies, cats on plains | June to October, also calving season Dec to Mar |
| Ngorongoro Crater, Tanzania | Dense wildlife, easy sightings, rhino chance | Year-round |
| Amboseli, Kenya | Elephants with mountain backdrops | June to October, Jan to Mar |
| Chobe, Botswana | Elephant herds, river scenes, boat-based images | May to October |
| Okavango Delta, Botswana | Water-based wildlife, birds, reflections, aerial patterns | June to October |
| Kruger, South Africa | Big Five variety, mixed habitats, self-drive or guided options | May to October |
| Etosha, Namibia | Waterhole photography, stark landscapes, clean backgrounds | May to October |
If you want the classic East Africa look, the Maasai Mara and Serengeti are hard to beat. The open terrain helps with visibility, the predator action can be excellent, and the migration period brings movement, dust, river crossings, and dramatic behavior. These parks suit photographers who enjoy action and storytelling.
If your dream image is elephant photography, Chobe and Amboseli stand out for different reasons. Chobe gives you large herds near water, often with boat-based angles you cannot get on a standard game drive. Amboseli is all about scale and backdrop, especially when the mountain shows clearly.
For unusual compositions, Botswana and Namibia are especially rewarding. The Okavango Delta gives reflections, reeds, mokoro angles, and beautiful aerial patterns. Etosha offers cleaner lines, pale backgrounds, and waterhole scenes that can feel almost studio-like in the dry season.
If you are photographing Kruger National Park, it can help to base yourself near the gates so you can start early and return late without long transfers. Around Hazyview, many travelers look for:
- Accommodation in Hazyview – Tembo Guest lodge
- Hazyview Accomodation – Tembo Guest lodge
- Hazyview Guesthouse – Tembo Guest lodge
- Hazyview Self Catering Accommodation – Tembo Guest lodge
- Kruger Accommodation – Tembo Guest lodge
- Kruger Park Accommodation – Tembo Guest lodge
Better fieldcraft means better images
Even excellent gear will not help much if the vehicle is in the wrong place. Position matters. Light matters. Background matters. A slight shift left or right can turn a busy frame into a clean one.
This is where good communication with your guide becomes part of the photographic process. Experienced safari guides know animal behavior, but they are not mind readers. If photography is a major goal, say so early and keep your requests clear and simple.
A few habits make a big difference during drives:
- Ask early: Let your guide know whether you prefer birds, big cats, elephants, or landscapes in context.
- Speak about angles: A small vehicle reposition can clean up a background or bring the light onto the eye.
- Watch the edge of the frame: Ears clipped by the frame, cut-off tails, and branches behind the head ruin many good sightings.
- Stay patient: Some of the best moments happen after a few quiet minutes, not in the first rush of excitement.
- Shoot wide and tight: Take the portrait, then pull back and include the habitat.
One of the biggest mistakes on safari is shooting every animal at eye level with the same lens and the same framing. Mix it up. Photograph the full scene, then the behavior, then the detail. A leopard in a tree can give you a portrait, a landscape, and a story frame in less than a minute if you think in layers.
Working from a vehicle without fighting the setup
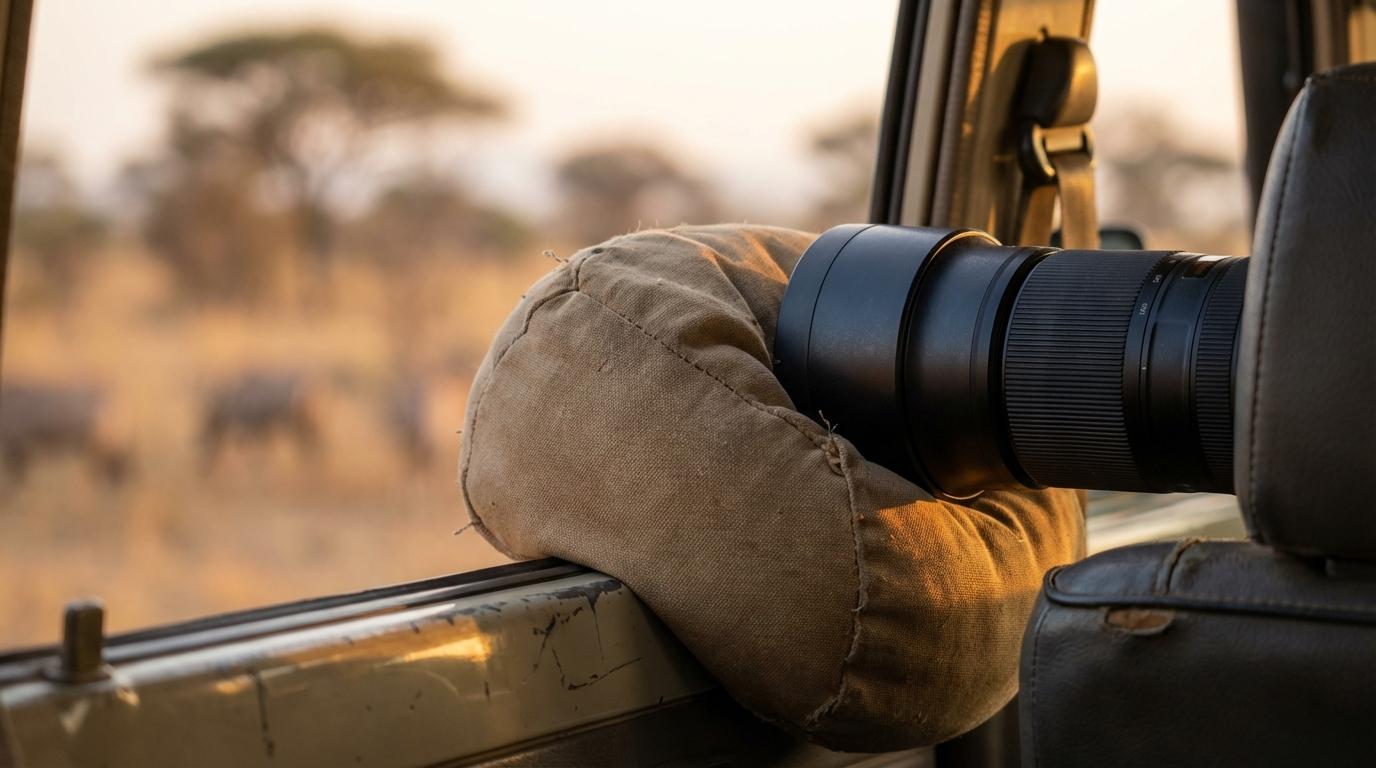
Most safari photography happens from a 4×4, and that changes your technique. You may be handholding, balancing a lens on a bean bag, or shooting over another passenger’s shoulder. Stability matters more than people expect.
A bean bag is one of the simplest and most effective supports you can bring. It rests on the window frame or rail, reduces shake, and works far better than trying to manage a full tripod in a vehicle. Monopods can help in some situations, but they are less flexible during fast sightings.
Keep your camera ready before the action starts. Lens cap off. Correct mode selected. Exposure checked. Burst mode on if needed. Wildlife sightings can appear suddenly, and the first few seconds are often the most active.
Operators that handle the driving schedule well can make a real difference here. Early morning and late afternoon drives give softer light and more active animals. A well-planned itinerary also reduces the chance of spending prime light stuck on a transfer when you could be shooting.
Planning the trip around your photography goals
A photographic safari works best when the itinerary matches the images you want. If you want river crossings, you need migration timing. If you want clean waterhole portraits, dry season is often best. If you want green backgrounds, young animals, and dramatic skies, the rainy season can be excellent even though sightings may be less predictable.
That is why it helps to plan around one main priority rather than trying to get everything in one trip. A birder will pack and travel differently from a couple hoping for luxury lodge stays and strong Big Five photography. A family may want shorter drives and parks with reliable sightings. A serious photographer may want private guiding, more time at each sighting, and fewer one-night stops.
Africa Moja Tours, for example, does not rent camera gear, so photographers should plan to bring their own kit, cleaning tools, spare batteries, and memory cards. The practical support comes through guided game drives, route planning, transfers, and itineraries built around good wildlife areas and productive shooting times. That kind of logistical help frees you to focus on camera work instead of worrying about park fees, road timing, or where the next overnight stop sits in relation to the game viewing area.
It also helps to ask a few questions before booking:
- Vehicle style: Open-sided, pop-up roof, private use, shared use
- Drive timing: Early starts, late returns, full-day options
- Photography pace: Will there be time to stay longer at sightings?
- Habitat mix: Plains, riverfront, woodland, wetlands
- Added experiences: Boat cruises, mokoro outings, hides, night drives where permitted
Before departure, test every piece of gear at home in low light and bright light. Practice changing ISO without looking, switching autofocus modes quickly, and moving from a perched bird setting to a running-animal setting. On safari, speed and familiarity matter almost as much as the camera itself.
